So, you want to create your own booch but don’t know where to start? Here, we show you how to make homemade kombucha, breaking down each step with helpful tips along the way!
Switchel, probiotic drinks, kefir: these wonder drinks can be found in any health food store drink case. Chock-full of healthy probiotics, these gut-healthy drinks sell like crazy. There seems to be an endless variety of these elixirs on the market, and that’s not likely to change anytime soon. Where did this craze begin? With kombucha, of course!
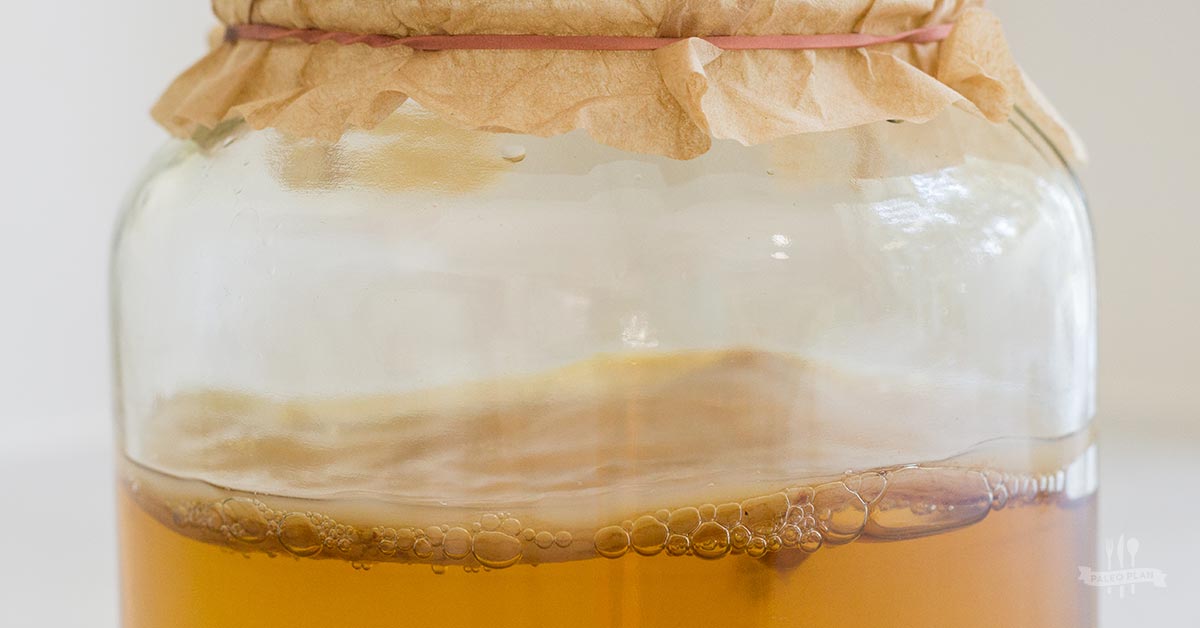
While the kombucha culture is sometimes referred to as a “tea mushroom,” kombucha is not actually brewed from a mushroom but from a colony of yeast and bacteria. This living colony of “good” bugs is called a SCOBY (symbiotic culture of bacteria and yeast). It’s also called the “mother.”
Gelatinous, thick, opaque, and leathery, it’s a wonder how the SCOBY came to be. We know that people have brewed kombucha for centuries, but its origin is an ongoing debate. Today, though, it’s so ubiquitous you can choose from endless flavors at your nearest gas station.
Kombucha has many health benefits, with possible cancer-fighting properties and the potential to aid in the treatment and prevention of diabetes among them. (1) (2) Kombucha also has potent antioxidant properties. (3) While research on the health benefits of kombucha itself is limited, the benefits of tea and probiotics, both of which are found in kombucha, are well-established.
Tasting your booch daily is a great way to gauge whether your batch is ready. If you let it ferment too long, the yeast will run out of sugar to feed on and start to die off.
Made with simple ingredients like tea, sugar, yeast, and bacteria (from the SCOBY), kombucha is easily and affordably made at home. Home-brewing can save you money and offer you a pretty cool hobby all in one. A couple of sterile vessels, cheesecloth and time is all the equipment you’ll need.
As you grow your home-brew operation, you’ll likely want to tweak your ratios and temperatures, or try new sugars and teas. You can also add flavors to keep it fresh.
Keep in mind that brewing kombucha is a living and variable process. Brewing in winter might take longer than it does in summer, and kombucha may taste better when brewed in a certain area of your home. This is because kombucha tends to brew too quickly in temperatures over 85 degrees and drags its feet below 50 degrees. Its sweet spot lands somewhere between 65 and 85 degrees.
Brewing kombucha in a cupboard may provide different results than countertop brewing. Kombucha relies on its environment, and environmental bacteria can cause flavor disruptions – and even harm – to your brews.
It’s important to ensure your brewing vessels and utensils are completely sterile to avoid any safety issues with your booch. Be sure to taste as you go; note the temperature of your booch’s environment and adjust accordingly. If you notice molds and foreign bacteria growths, throw it out.
Home-brewing is a bit of an experiment. Have fun, practice safe brewing methods, and enjoy the trials and triumphs of your failed and successful brews. Batches aren’t always consistent, but it gets better. Brew on!
Essential Kombucha Ingredients

- 1 SCOBY
- 4 oz black tea
- 1 gallon of water
- 1 cup of sugar
Find Your Starter
In home-brewing, getting your hands on a SCOBY is step one. Kombucha brewers usually have more than enough SCOBYs to share. Your brewing buddies will probably have a back stock of SCOBYs on their hands.
This is because every time you brew a batch of kombucha, a new layer will grow on top of the mother producing a baby SCOBY. These babies can be used on their own for the next batch. You will want to let the baby get as big as its mother before you remove it from the batch and/or separate it. This will ensure your baby SCOBY is healthy and strong before you let it brew on its own.
If you’re unable to obtain a SCOBY from a fellow kombucha brewer, it’s also possible to purchase one online. If you’re patient and up for some experimentation, you can grow your own SCOBY from a bottle of raw, unflavored kombucha.
Which Tea Makes the Best Booch?
SCOBYs like black tea for its tannins. You can use green tea as well, but if you do, it’s best to cut it with a bit of black tea. Opt for a loose leaf, high-quality variety.
Which Sugar Should You Use?

Sugar is notoriously nutrient deficient, and even harmful to your health. Keep in mind, though, that the sugar in your brew is not for you but for the SCOBY. The yeast and bacteria that make up your SCOBY eat the sugar and convert it into healthy acids for you to consume.
You may have heard that you need to use “plain white sugar” to brew your own booch. Yes, plain sugar is the most easily digested by the SCOBY’s yeast and bacteria, but confirm that your sugar is made from actual sugar cane. Look explicitly for “cane sugar” written on the label, otherwise you may grab beet sugar – a GMO, bleached, and heavily-processed product. Technically anything that can be fermented by yeast will work, but if you are just starting out with home-brewing, go with a granulated sugar made from sugar cane.
Breathing Room for Your Kombucha
After you make your tea, add and dissolve the sugar, let it cool before adding the SCOBY. Once you have added your SCOBY to the tea mixture, be sure to use a breathable cover. It should keep things like bugs out but still allow air to flow through. Without ventilation, your kombucha will not ferment. Cheesecloth and a rubber band offer an easy solution.
How Long Should It Ferment?
Tasting your booch daily is a great way to gauge whether your batch is ready. If you let it ferment too long, the yeast will run out of sugar to feed on and start to die off. This produces a rather funky flavor. On the other hand, if you strain and bottle your booch too soon, there may be excess sugar that has not yet been metabolized by the SCOBY.
So how do you check? Taste your booch every day as you brew and see for yourself where the sweet spot is. This will vary according to the brewer’s preference. Ultimately, brew time varies based on the temperature, environment, the strength and health of your SCOBY, and your flavor preferences.
Sterilizing Your Equipment
Be sure to practice sterile methods when brewing your booch. The more you disrupt the brew by agitating and tasting it, the more likely you are to introduce harmful bacteria to the tea. Use spotlessly clean glassware, funnels and utensils. Taste gingerly with a clean straw so that you do not need to remove the entire cheesecloth cover every day. If there is mold, just toss it.
Flavor Your Batch

Once you’re happy with the tangy flavor and slight effervescence of your kombucha, it’s time for you to add extra flavor if you so desire. Gently remove your mother and its baby SCOBY and strain the kombucha into another clean vessel. You can then add fresh or frozen fruits, juice, extracts and herbs. Experiment with proportions and combinations of flavors. Bottle and refrigerate to halt any further fermentation. Enjoy!
Want More Bubbly Kombucha?
You may choose to do a second fermentation with or without your flavorings. A second ferment will allow your kombucha flavors to meld and mellow out, as well as provide more of that sparkly effervescence that we know and love.
You will want to use an airtight container or bottle; a Grolsch-style flip-top bottle is ideal for a second ferment as it truly blocks out carbon dioxide and keeps all of those fermentation gasses tightly locked in.
Use high-quality bottles and check for cracks and seeps that could ruin the integrity of your glass. Pressure can build quickly and cause your bottle to explode if you are not using strong bottles that are in peak shape.
“Burp” your brew every day by simply opening your airtight cap and closing it again. This allows excess pressure to release and creates more room as your brew becomes bubbly. There is no strict amount of time for a second fermentation – typically two days to two weeks will result in a successful fermentation.
Can You Store Your SCOBY?
If you store your SCOBY, you can try to store it in a container in the fridge along with some of its brew; the chilled environment will slow down the bacteria growth necessary for the culture.
Freezing is a popular method of storing your SCOBY, but you run the risk of destroying the molecular structure. Unless you have access to flash freezing, the SCOBY and brew will freeze at different times, forming damaging ice crystals.
Keep these home-brewing guidelines in mind, and you’ll be on your way to brewing your first batch of kombucha at home in no time!
Ready to make your own kombucha? Try out this simple DIY Kombucha Recipe here.